A living room renovation before and after looks dramatic in photographs because the camera hides the ugly middle: dust, exposed wiring, uneven floors, and a sofa sitting in the dining room for three weeks. I have managed enough living room work in San Antonio to know the finished room is won before the paint color is chosen. The floor, walls, lighting, airflow, and furniture measurements all have to work together.
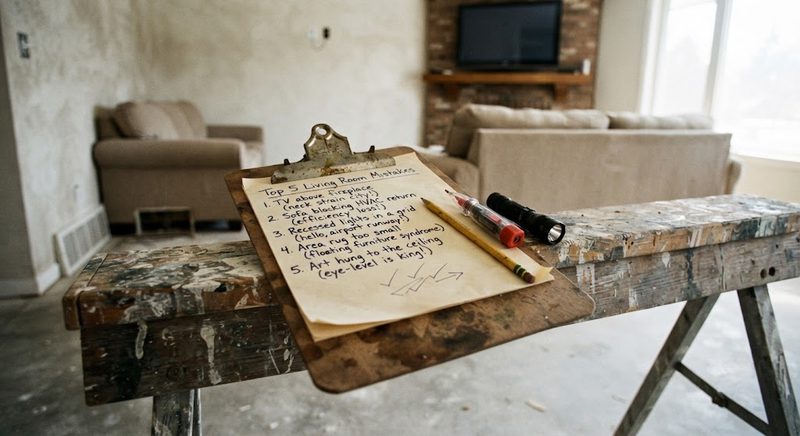
A sensible renovation starts with an inspection, not a shopping trip. Walk the room with a flashlight. Look for floor bounce, cracked drywall, loose trim, water stains, rattling vents, and outlets that are too far from where people actually sit. Measure every wall, doorway, window, and stair turn. A sectional that fits on paper can still get stuck at the front door.
The real order of operations
The first stage is demolition and investigation. Remove carpet, baseboards, damaged drywall, and outdated fixtures carefully enough to see what is behind them. In a 1990s house, I commonly find poorly patched drywall, undersized electrical boxes, and HVAC registers placed where a sofa needs to go. In an older San Antonio bungalow, I also look closely at subfloor damage, pier-and-beam movement, and old wiring.
Next comes structural and mechanical work. Fix a soft subfloor before installing flooring. Move electrical outlets before closing the walls. Add a dedicated circuit if the room will carry a television, soundbar, floor lamps, and charging equipment. If a wall is being removed, confirm whether it is load-bearing before anyone swings a sledgehammer. A $150 inspection is cheaper than repairing a sagging ceiling.
After rough electrical and any framing repairs, hang and finish drywall. Only then should you install flooring, paint, trim, lighting, window coverings, and furniture. This order protects the expensive parts. Painting before sanding drywall leaves a gritty film on the walls, while laying new flooring before cabinet or wall work invites dents and adhesive stains.

What the before-and-after photos leave out
A strong living room renovation before and after is not just new furniture against a white wall. The “before” room often has three separate problems: poor light, a bad traffic path, and furniture that is too large or too small. The “after” room works because those problems were corrected in sequence.
Start with circulation. Leave roughly 30 to 36 inches for the main walking route when the room allows it. Do not force people to cut between the coffee table and television every time they walk to the kitchen. A coffee table usually belongs about 16 to 18 inches from the sofa, close enough to reach but not so close that knees hit the edge.
Sofa depth deserves more attention than fabric color. Many modern sectionals run 39 to 43 inches deep. That can be comfortable for lounging, but it can make a modest room feel blocked and leave shorter adults sitting with their feet off the floor. For a family room used every day, test the seat height and depth in person. A handsome sofa that hurts your back is an expensive mistake.
Lighting should have at least three jobs: general light, task light, and softer evening light. Recessed fixtures alone make faces look harsh and leave corners dim. I prefer a sensible ceiling fixture or recessed layout paired with table or floor lamps near the seating. Use warm white bulbs around 2700K to 3000K for a living room, and put frequently used lights on dimmers.
What a San Antonio budget looks like
For a modest living room renovation before and after project in San Antonio, expect about $8,000 to $15,000 if the layout stays put and the work includes patching, paint, lighting updates, trim, and new flooring. A more involved remodel with electrical changes, built-ins, ceiling repairs, and midrange furniture can run $18,000 to $35,000. Removing a wall, correcting structural problems, or replacing damaged subfloor pushes the number higher.
A typical midrange budget might include $2,500 to $6,000 for flooring, $1,500 to $4,000 for drywall and painting, $800 to $2,500 for electrical and lighting, and $2,000 to $6,000 for a sofa and chairs. Trim, hardware, window coverings, delivery, disposal, and permits can add another $1,500 to $4,000. The sofa is not the whole furnishing budget; a coffee table, rug, lamps, side tables, and installation charges add up quickly.
The budget usually blows up in the walls and floor. Once the carpet comes out, homeowners discover pet damage, stains from an old leak, or a subfloor panel that flexes. Once a wall opens, an electrician finds wiring that cannot safely support the planned fixtures. Keep a 10% to 15% reserve for these findings. If you spend every dollar on finishes, the repair money will come from somewhere visible.

Materials that hold up to real life
For flooring, luxury vinyl plank is practical in homes with kids, dogs, and occasional spills. It is not indestructible, and cheap thin products can telegraph every subfloor defect, so the underlayment and floor preparation matter. Engineered hardwood gives a warmer, more substantial feel, but it costs more and still needs protection from standing water and dragging furniture.
If you are repairing drywall, do not accept a patch that is merely painted over. The repair should be taped, feathered across a broad area, sanded smooth, and primed before the finish coat. Flat paint hides some wall defects, but eggshell is easier to wipe in a busy room. I usually prefer washable eggshell on walls and a durable satin on trim, provided the surfaces are properly prepared.
Rugs need a pad. Without one, the rug creeps, corners curl, and the backing can mark the floor. Choose a pad that matches the flooring manufacturer’s guidance. For curtains, measure from the rod to the floor instead of guessing from a catalog photo. Short panels often make a room look unfinished and can expose uneven window trim.
A project check before you buy anything
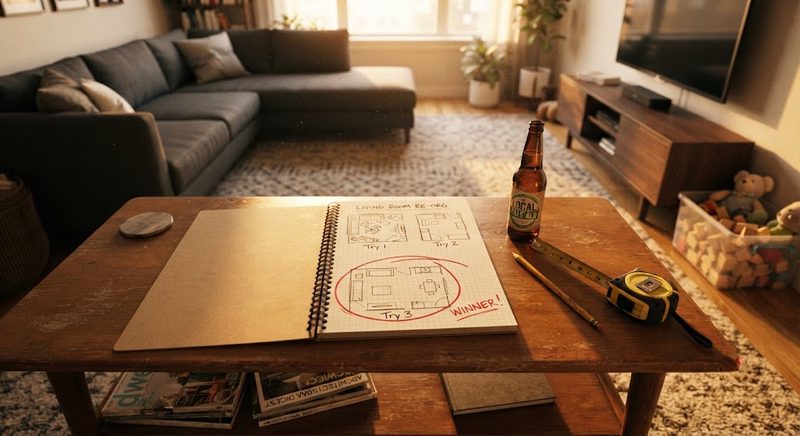
The best living room renovation before and after results come from decisions made with a tape measure. Mark the proposed sofa, chairs, and coffee table on the floor with painter’s tape. Open doors and walk the route. Put a cardboard box where a built-in or media console will go. Check that the television is not directly opposite a bright window, and confirm that the screen height works from the actual seating position.
Create a written scope before requesting contractor prices. Specify demolition, drywall repair, electrical work, flooring preparation, installation, painting, trim, cleanup, and who supplies each fixture. Three vague estimates are less useful than two detailed ones. Ask how change orders are handled and when the crew expects payment. A low bid that leaves out floor leveling or haul-away is not low after the extras appear.
For a before-and-after record, photograph the room before demolition, after the walls open, after repairs, and at completion. Save paint colors, flooring information, appliance or lighting model numbers, and leftover materials. Six months later, that folder will tell you what to buy when a trim piece gets damaged or a wall needs a matching touch-up.
The finished room should work harder
A successful living room renovation before and after is easy to live in, not merely pleasant to photograph. You can cross the room without sidestepping furniture. Lamps have reachable switches. The television is visible without twisting your neck. The floor does not bounce, the vents are not blocked, and the trim meets the floor cleanly.
Spend first on the problems that affect the structure and daily use. Repair the floor, correct unsafe wiring, improve the light, and set the layout before chasing decorative upgrades. A $300 lamp cannot rescue a room with a bad traffic path, but a properly placed outlet and a correctly sized sofa can change the way the whole house feels. That is the difference between a renovation that photographs well and one that still works five years later.

No comments yet — be the first to share a thought.