If you want to know how to hang curtains, start with a tape measure, not a drill. Most bad curtain jobs are not caused by expensive fabric or difficult walls. They happen because the rod is too short, the brackets are barely attached, or somebody measured from the window instead of the room. I have fixed all three more times than I can count.
Curtains should control light, provide privacy, and sit clear of the glass without fighting the trim, furniture, or HVAC vent. The job is simple when you handle it in the right order: measure, locate the framing or anchors, install the hardware, then hang and adjust the fabric. Skip the measuring step and you will be patching holes before dinner.
Measure the Window and Wall First
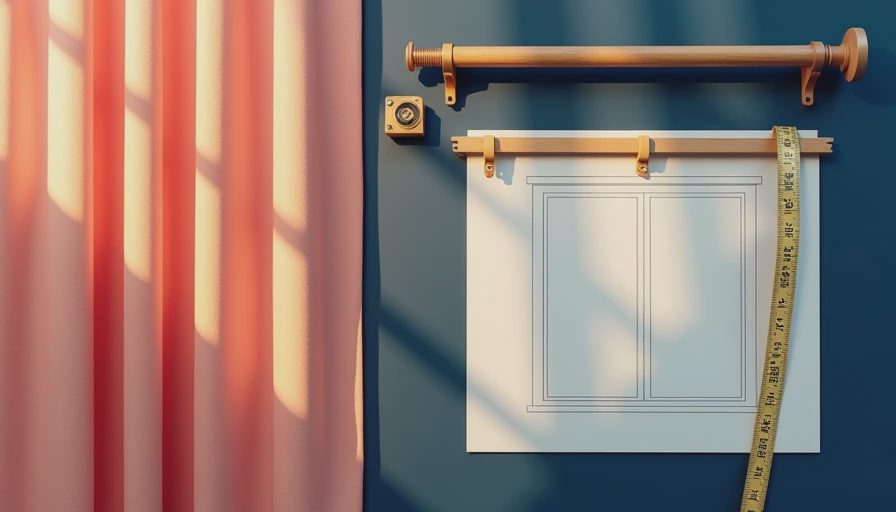
The first step in how to hang curtains is deciding whether the rod will sit inside the window opening or outside it. For living rooms, I usually recommend outside mounting. Place the rod roughly 4 to 6 inches above the top of the window trim, or about 2 to 4 inches below the ceiling if the room has standard 8-foot walls. This makes the window look taller and lets the panels clear the glass.
Measure the window width, then add at least 8 to 12 inches total so the curtains can stack beside the opening. A 60-inch window generally needs a rod around 72 inches wide. If the rod is exactly the width of the window, the fabric will cover the glass even when the curtains are open.
For full-looking panels, the combined fabric width should be about 1.5 to 2 times the rod width. A 72-inch rod needs roughly 108 to 144 inches of total curtain width. Ready-made panels are often 50 or 52 inches wide, so two panels may look skimpy on a broad window.
Choose Hardware That Matches the Wall
Knowing how to hang curtains also means knowing what is behind the drywall. A curtain rod is not heavy by itself, but two thick lined panels can pull hard on the brackets every time someone opens them. If you can hit a wall stud, use a screw long enough to get solid wood bite. A 2 1/2-inch construction screw is usually more dependable than the tiny screws packed with a bargain rod.
If there is no stud where you need one, use a proper drywall anchor. Plastic expansion anchors are fine for light sheers, but I prefer toggle-style anchors for lined curtains. Read the anchor's weight rating and remember that ratings are not a license to hang a 30-pound theater curtain from one point. Wide rods should have a center bracket, especially in drywall.
For plaster, brick, or concrete, use the matching masonry bit and anchors. Do not force a general-purpose drywall anchor into masonry and expect it to hold. That is how brackets loosen, holes grow, and the rod ends up on the floor at 2 a.m.
Install the Rod Without Guesswork
Before you learn how to hang curtains, mark both bracket locations with a level. Measure from the floor or ceiling, not just from the top of the trim, because uneven floors and ceilings can make equal measurements look wrong. Hold the rod in place and check it visually from across the room before drilling.
Use painter's tape to mark the screw locations. Drill a small pilot hole into a stud, or drill the correct opening for your anchor. Install the brackets, set the rod in place, and check the level again. A one-eighth-inch slope is noticeable on a long wall, particularly with curtains that have vertical stripes.
Do not install the center bracket after the rod is loaded. Put it in place first, then slide the rod through its supports. If the rod telescopes, keep the adjustable joint near a bracket rather than in the middle of a wide span. The joint is the weak point, and fabric movement will eventually expose it.
Get the Curtain Length Right
For most living rooms, curtain panels should either barely kiss the floor or break slightly onto it. Measure from the rod position to the floor, then subtract about half an inch for a clean finish. If you have pets, children, or a robot vacuum, avoid dramatic puddling. Extra fabric becomes a dust brush, catches on feet, and usually looks tired within months.
If the panels are too long, do not assume the advertised size is exact. Ready-made curtains can vary by an inch or more. Hang them for a day, let the folds settle, and then pin or hem them. Ironing alone will not fix a 3-inch length problem. Iron-on hem tape works for a temporary adjustment, but sewn hems hold up better after washing.
Short curtains that stop several inches above the floor usually look accidental unless they are designed for a sill or radiator. If a baseboard heater, register, or piece of furniture blocks the drop, solve that conflict before buying panels.

Avoid the Mistakes I See on Finished Jobs
The most common mistake in how to hang curtains is mounting the rod directly on the window trim. That often leaves the panels too narrow and makes the window look compressed. The second mistake is using a rod that bows in the middle. Thin metal rods from discount stores can work on a small bedroom window, but a 100-inch living-room opening needs a heavier steel or wood rod with a center support.
Another problem is placing brackets so close to the glass that the curtain rubs against the window lock. Leave enough return depth for the fabric to hang freely. Check door swings, wall sconces, thermostats, and return-air grilles before drilling. I once watched a homeowner install a beautiful rod directly across a ceiling vent. The curtain blocked airflow, and the room ran noticeably warmer.
Finally, do not confuse decorative finials with structural support. A fancy end cap does not make a weak bracket stronger. Spend the money on solid hardware first, then choose the finish.
A Practical Installation Checklist
Here is how to hang curtains in the order I use on a job site:
- Measure the window, wall width, floor height, and clearance around trim.
- Choose an outside mount unless the window or shade requires an inside mount.
- Select a rod that extends at least 4 to 6 inches beyond each side of the window.
- Confirm the rod diameter and bracket depth can handle the curtain fabric.
- Find studs with a stud finder, then verify by tapping or making a tiny test hole.
- Mark both brackets with a level and add a center bracket for long spans.
- Drill pilot holes or install anchors rated for the loaded curtain weight.
- Tighten the hardware, check level, and install the rod before adding panels.
- Hang the curtains, spread the folds evenly, and let the fabric settle.
- Hem only after confirming the final length from the installed rod.
That sequence prevents most repairs. It also keeps you from making six holes in the wall while trying to make two brackets line up.
Spend Money Where It Prevents Repairs
You do not need custom curtains to get a good result. A pair of decent lined panels often costs $40 to $120, while a reliable rod and bracket set can run $25 to $90. Custom work starts much higher, commonly several hundred dollars per window, but it makes sense for unusually tall openings, bay windows, or difficult fabrics.
If the budget is tight, buy better hardware and simpler fabric. A $35 panel on a straight, properly supported rod looks finished. A $150 panel on a crooked rod with loose anchors still looks like a mistake. This is how to hang curtains so they stay useful: mount them high enough, wide enough, and strong enough for daily use.
Take your time with the layout, and the final installation will take less time than repairing a pulled-out bracket. Measure twice, drill once, and do not let a package photo make the decisions for your wall.


No comments yet — be the first to share a thought.