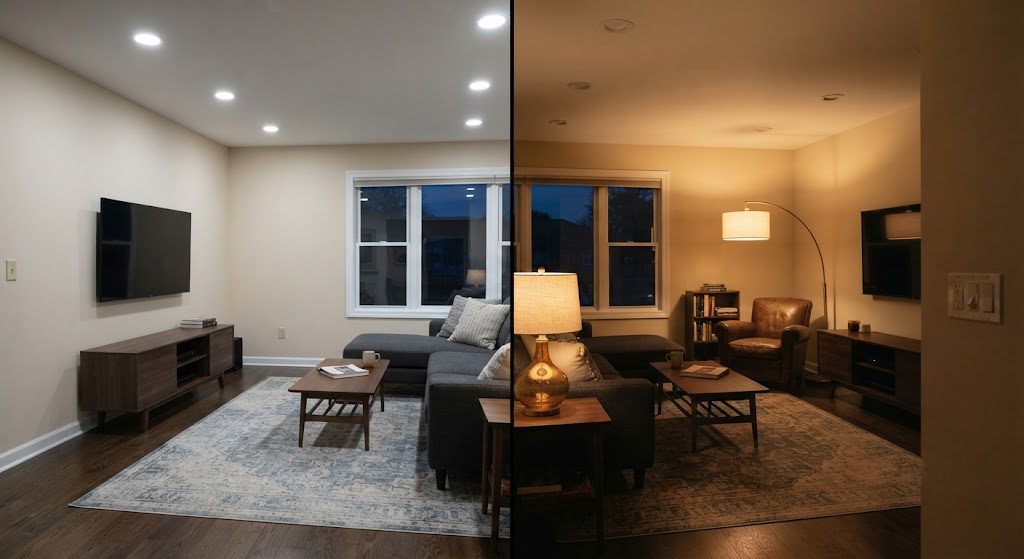
Most living rooms are lit by an electrician who never asked where the sofa was going. He wired six recessed lights in a grid, put them on one switch, and moved on to the next house. Now you've got a room that looks like a 7-Eleven at midnight — flat, bright, and completely without atmosphere. Turn the lights off and it's a cave. Turn them on and it's an operating room. Neither option works when you're trying to watch a movie or have a conversation that doesn't feel like an interrogation.
Lighting a living room right means thinking in layers. I learned this the hard way, after wiring my first few remodels with a single overhead grid and watching clients dim the lights to 20 percent every evening because full brightness was unbearable. Here's the three-layer system I use on every job now — overhead, task, and accent — and how to put it together without overcomplicating things.
Layer One: Overhead Ambient Light
This Is Your Base Layer, Not the Whole Show
Ambient light fills the room with a general, even glow. It's the foundation — not the star. In most living rooms, recessed cans do this job. The mistake is treating them like the only light source and laying them out before the furniture plan exists.
I place recessed lights to wash the perimeter of the room and light the walkways, not to shine directly onto seating. The beam from a standard recessed downlight hits the back of the sofa and creates a hot spot on the upholstery. Instead, aim for general illumination that bounces off walls and the ceiling. Wall-washer trims near the perimeter help spread light without creating harsh shadows.
The number of cans depends on the room size, but the key is putting them on a dimmer. Every overhead circuit in a living room should be dimmable. If you do nothing else, swap the switch for a dimmer. It's a fifteen-dollar upgrade that changes how you use the room after dark.
Ceiling Fans With Lights: Don't Let Them Do All the Work
A ceiling fan with a light kit is not a lighting plan. It's one fixture in the center of the ceiling casting a cone of light downward and leaving the corners in shadow. Use it as part of the ambient layer, but don't rely on it alone. I put the fan light on a separate switch from the recessed cans so it can be turned off when the room doesn't need a bright center point.
Layer Two: Task Lighting
Put Light Where People Do Things
Task lighting is exactly what it sounds like — light directed at a specific spot where someone reads, writes, works on a laptop, or does a puzzle with the kids. In a living room, task lighting usually means floor lamps and table lamps placed next to seating.
A floor lamp belongs next to a reading chair, with the bottom of the shade at eye level when seated. If the lamp is too tall, the bulb is visible and glares in your peripheral vision. A table lamp on a side table next to the sofa gives you enough light to read a book or see the remote controls without washing out the TV screen.
The rule I follow: every seat in the room should have a light source within arm's reach. Not every light has to be on, but the option should exist. I put task lights on switched outlets or smart plugs so they can be controlled without walking around the room turning individual lamps on and off.
Layer Three: Accent Lighting
The Layer That Makes the Room Feel Finished
Accent lighting isn't strictly functional — it's what gives the room depth. It might be a picture light over a piece of art, an LED strip inside a bookcase, or a small uplight in a dark corner that would otherwise recede into shadow. Accent lights create visual interest without calling attention to themselves.
This is the layer I add last, and it's the one that makes clients say the room finally feels "done." It doesn't take much. A single picture light over a large piece on the focal wall, or a warm LED strip inside open shelving, pulls the eye around the room instead of stopping at the brightest overhead source.
Putting It All Together: Zones, Switches, and Dimming
Every lighting layer should be on its own circuit or at minimum its own switch leg. Ambient lights on one dimmer. Task lamps on switched outlets, or at least controllable with a smart plug system. Accent lights on their own switch or a photosensor that turns them on at dusk.
If you're doing a full renovation, rough-in extra switch locations. It costs almost nothing to run a wire to a future accent location while the walls are open. Adding it later means cutting drywall.
The final step: pick the right color temperature for each layer. I run 3000K for ambient — warm but not yellow. Task lights can go 3000K or 3500K for a slightly crisper light that's easier to read by. Accent lights I keep at 2700K, warm and soft, like incandescent. Mixing color temperatures in the same room at the same time creates a disjointed feel. Keep them within 300K of each other and the eye won't notice.
What's in My Living Room Right Now
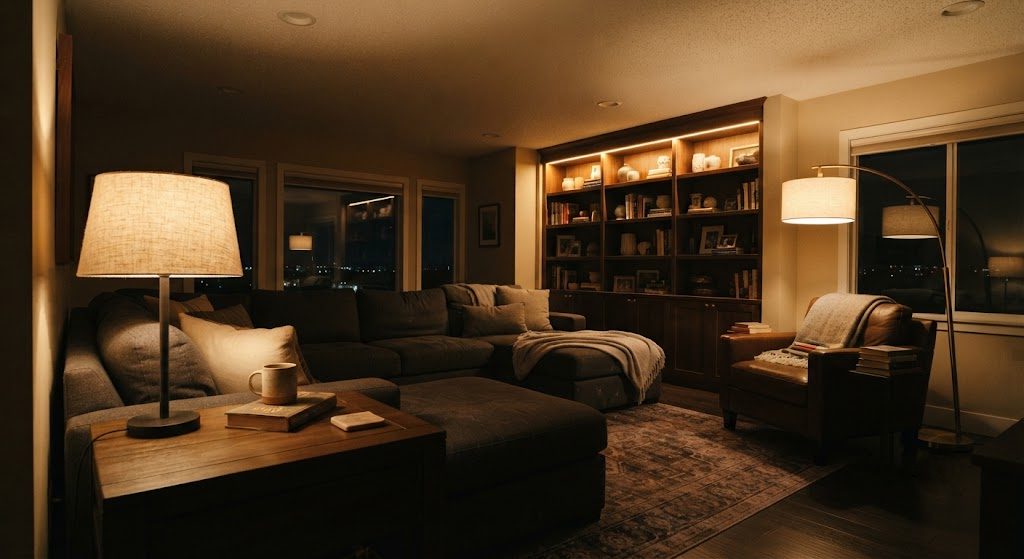
I've got four recessed cans on a dimmer, a ceiling fan with a light on its own switch, a floor lamp next to the reading chair, a table lamp on the side table by the sofa, and an LED strip above the built-in bookcase. Total cost for the lighting package was under six hundred dollars, not including the rough-in that I did myself. In the evening, I dim the overheads to about 40 percent, turn on the two task lamps, and leave the accent strip glowing. The room feels warm, functional, and nothing like a dentist's office.
Light a living room in layers. Your eyes will thank you, and your guests won't know why the room feels good — they'll just know it does.

No comments yet — be the first to share a thought.