Recessed lighting spacing is one of those jobs that looks simple until the drywall is finished and every ceiling light lands in the wrong place. I have walked into living rooms where the installer centered four cans in the room, even though the sofa, television, and reading chair sat around the edges. The middle of the ceiling was bright. The furniture was not.
A good layout starts with the room below the ceiling. Measure the walls, mark the furniture, locate the ceiling joists, and decide what each light is supposed to do before anybody cuts a hole. A six-inch can placed by habit is not a lighting plan. It is a permanent mistake with trim around it.
Start With the Walls, Not the Ceiling
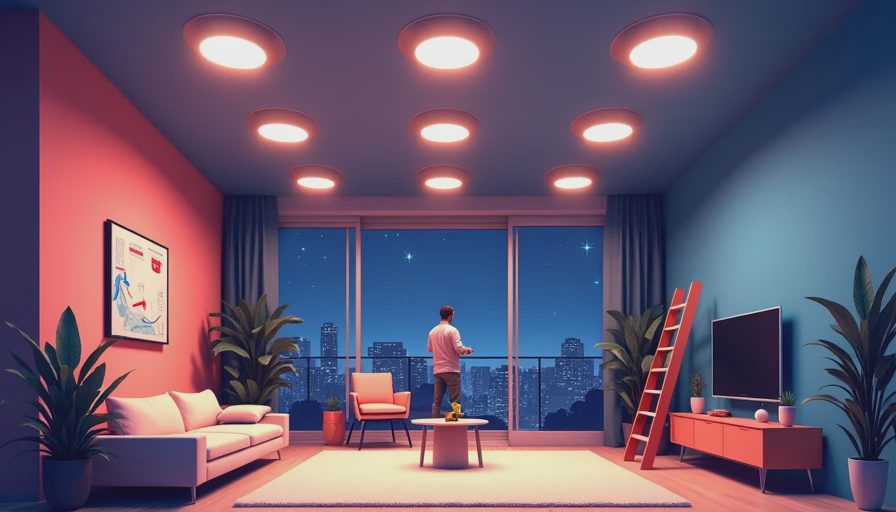
For a typical eight- or nine-foot living room ceiling, place the first row of recessed lights about 24 to 36 inches from the wall. That distance puts light onto the wall and floor without creating a bright stripe directly beside the drywall. If the room has artwork, bookcases, or textured stone, you might move the row closer so the light washes that surface.
The usual recessed lighting spacing between fixtures is about four to six feet. Smaller four-inch LED fixtures often work well at four-foot intervals, while larger six-inch fixtures can spread farther if their beam is wide enough. The manufacturer’s beam angle and lumen rating matter more than the hole size. Two fixtures with the same diameter can throw very different patterns.
Do not divide the room into equal squares and call the layout finished. A living room is rarely used evenly. The sofa may run along one wall, the television may sit on another, and a walkway may cut through the middle. The lights should support those areas rather than obey a mathematical grid that ignores how people move.

In one San Antonio remodel, the original plan called for three rows of four lights. It looked tidy on the electrician’s drawing. On site, the outer rows landed directly over the sofa and media cabinet, which would have put glare in people’s eyes and reflections across the television. We shifted the lights toward the open floor and used wall-mounted sconces near the seating. That change cost almost nothing before drywall and would have been an expensive patch afterward.
Use Furniture to Set the Grid
Before final recessed lighting spacing is marked, draw the furniture footprint on the floor or ceiling plan. A light over the center of a coffee table is useful. A light directly behind a seated person can cast a shadow over the book they are reading. A light aimed at the television can reflect in the screen, especially with glossy panels or windows opposite the set.
For a standard sofa, the first row often works 30 to 36 inches out from the back wall. That puts light in front of the seating instead of directly above somebody’s head. If the sofa floats in the room, treat it as a divider and light both sides according to the walking paths. Leave enough clearance for tall furniture, ceiling fans, and doors that swing into the room.
A common four-light layout might use two fixtures near the outside walls and two toward the center, with roughly five feet between fixtures. That is only a starting point. A long, narrow room may need a single line of lights, while a wide room with a fireplace may need separate zones. Put the fireplace or artwork on its own lighting circuit if it deserves attention after the main lights are off.
Match Spacing to the Fixture
The fixture’s beam spread tells you how far apart the lights can be before dark gaps appear. A narrow 40-degree beam needs tighter recessed lighting spacing than a wide 110-degree beam. Look for the photometric diagram on the product sheet instead of trusting the picture on the box.
For general living room lighting, many installers aim for roughly 700 to 1,000 lumens per fixture, then put the fixtures on a dimmer. That gives you useful light for cleaning and enough control for movie night. A room with dark wood, dark paint, or a high ceiling usually needs more output than a bright room with white walls.
I have installed plenty of wafer-style LEDs from brands such as Halo, Lithonia, and Juno. They are useful where joists leave little space, but they still need proper placement. The thin housing does not make a bad location acceptable. Also check that the fixture is rated for insulation contact when it will be covered by attic insulation. The right spacing cannot fix an unsafe installation.
Watch for Joists, HVAC, and Fans
The ceiling plan has to survive contact with the structure. Joists, plumbing, electrical cables, ductwork, and recessed air-conditioning vents can all block a fixture. In older homes, the ceiling may also have furring strips or repairs that are not visible until a small inspection hole is made.
Mark the proposed locations with painter’s tape before cutting. Stand where the sofa will be and look up. Then check the attic or use a stud finder to confirm what is overhead. A two-inch adjustment can avoid a joist and still keep the overall recessed lighting spacing balanced. Do not force a light into a bad position simply because the drawing is symmetrical.
Keep recessed lights clear of ceiling fans. A fan blade crossing directly through the light pattern can create a distracting flicker, and a fixture placed too close to the fan may be difficult to service. HVAC supply vents also deserve separation. Light shining across a vent can make dust and grille marks more noticeable.
Plan Switches and Dimming Before Drywall
A living room should not have every fixture on one switch. Separate the main downlights from wall-washing lights, fireplace lighting, and any lamp outlets controlled by a switch. That gives the room several useful settings instead of one bright setting and one dark setting.
Use LED-compatible dimmers matched to the fixtures. Cheap or incompatible dimmers can cause buzzing, flashing, a limited dimming range, or lights that refuse to shut off cleanly. If you are installing smart controls, confirm whether the switch needs a neutral wire and whether the system works with the selected LED driver.
The best recessed lighting spacing still feels wrong when the controls are inconvenient. Put the entry switch where your hand naturally reaches when you walk in, and use a second control near the main seating area when the room layout allows it. This is wiring work, so follow local electrical requirements and use a licensed electrician when the job exceeds your experience.
The Fastest Way to Catch a Bad Layout
Take a scaled room sketch and draw the walls, furniture, windows, doors, fan, vents, and lights. Then check three things. First, no fixture should shine straight into the television or directly into seated eyes. Second, the light should cover the surfaces and paths people actually use. Third, the pattern should look intentional from the doorway without forcing every fixture into a perfect grid.
If a fixture is only six inches away from a wall while its neighbor is six feet away, the ceiling will announce the error every night. Adjust the whole row rather than correcting one hole at a time. Symmetry matters, but useful light matters more.
When in doubt, mock the locations with temporary work lights or tape marks and live with them for a day. Walk through the room in daylight and after dark. Recessed lighting spacing is cheap to change on paper, reasonable to change before drywall, and frustrating to change after the ceiling is painted. Measure twice, mark once, and make the furniture earn its place in the plan.


No comments yet — be the first to share a thought.